Outbound Endpoint实验
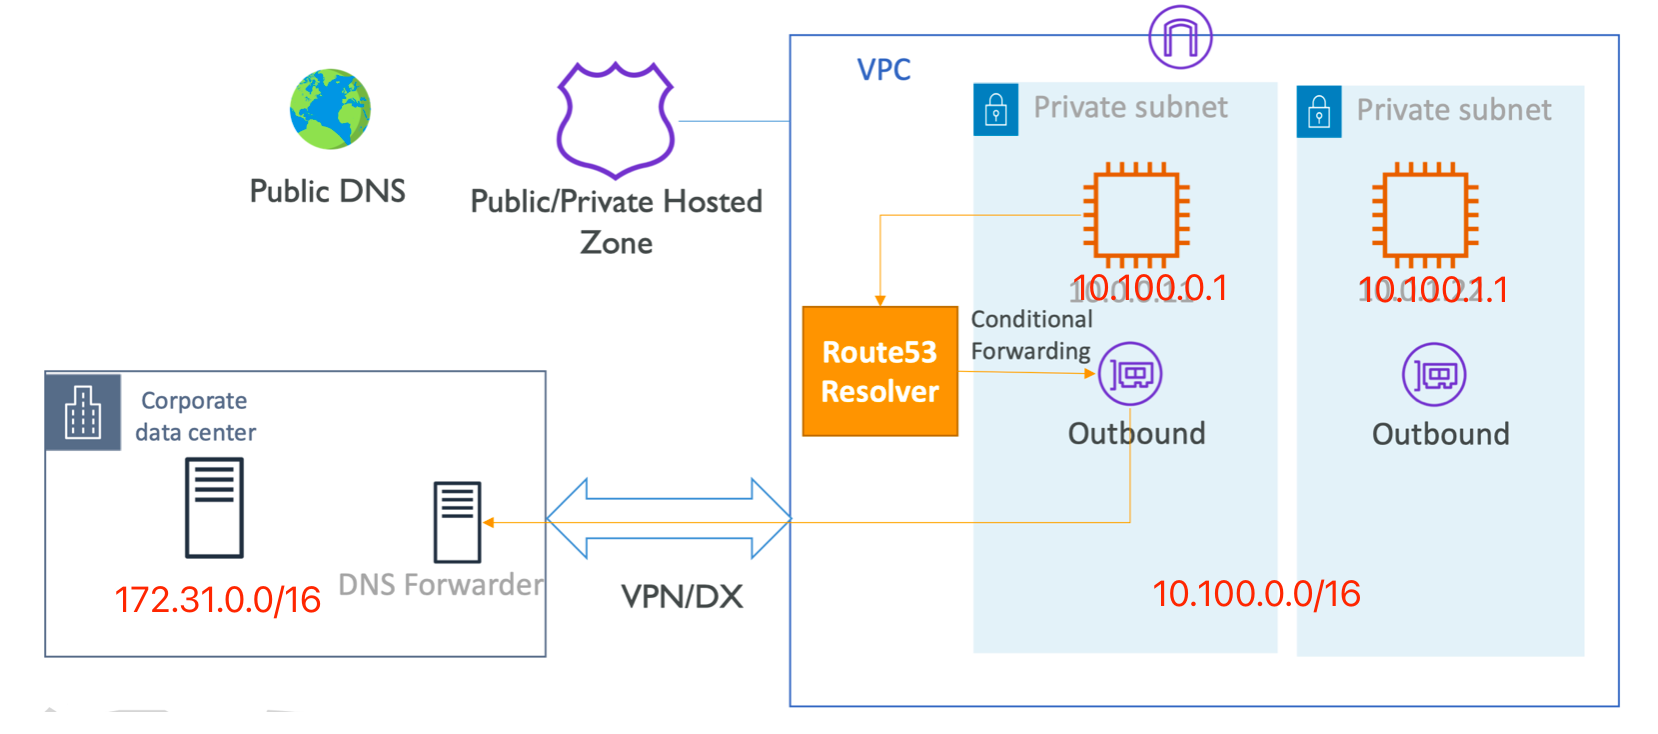

Outbound Endpoints
Route53不能解析到用户托管的(或其他VPC)DNS服务器上的域名:

使用Route53 Outbound Endpoint添加额外的规则,可以解析这个问题:

实践
创建本机托管DNS域
创建DNS域的文档:https://help.ubuntu.com/community/BIND9ServerHowto
接着上一节在10.4.0.0网段搭建的DNS服务器,当作on-prem的DNS服务器。
在上面添加一个用户托管的域名。
编辑/etc/bind/named.conf.local:
//
// Do any local configuration here
//

// Consider adding the 1918 zones here, if they are not used in your
// organization
//include "/etc/bind/zones.rfc1918";


zone "nyc3.example.com" {
    type master;
    file "/etc/bind/zones/db.nyc3.example.com"; # zone file path
};
创建文件/etc/bind/zones/db.nyc3.example.com:
$TTL 604800
@ IN SOA ns1.nyc3.example.com. admin.nyc3.example.com. (
                  3 ; Serial
             604800 ; Refresh
              86400 ; Retry
            2419200 ; Expire
             604800 ) ; Negative Cache TTL
;
; name servers - NS records
     IN NS ns1.nyc3.example.com.
     IN NS ns2.nyc3.example.com.

; name servers - A records
ns1.nyc3.example.com. IN A 10.128.10.11
ns2.nyc3.example.com. IN A 10.128.20.12

; 10.128.0.0/16 - A records
host1.nyc3.example.com. IN A 10.128.100.101
host2.nyc3.example.com. IN A 10.128.200.102
重启bind9,测试效果:

表明自己托管的 DNS域成功生效。
此时在本机进行nslookup,也能生效(不过一定要在named.conf.options加上本机的IP):

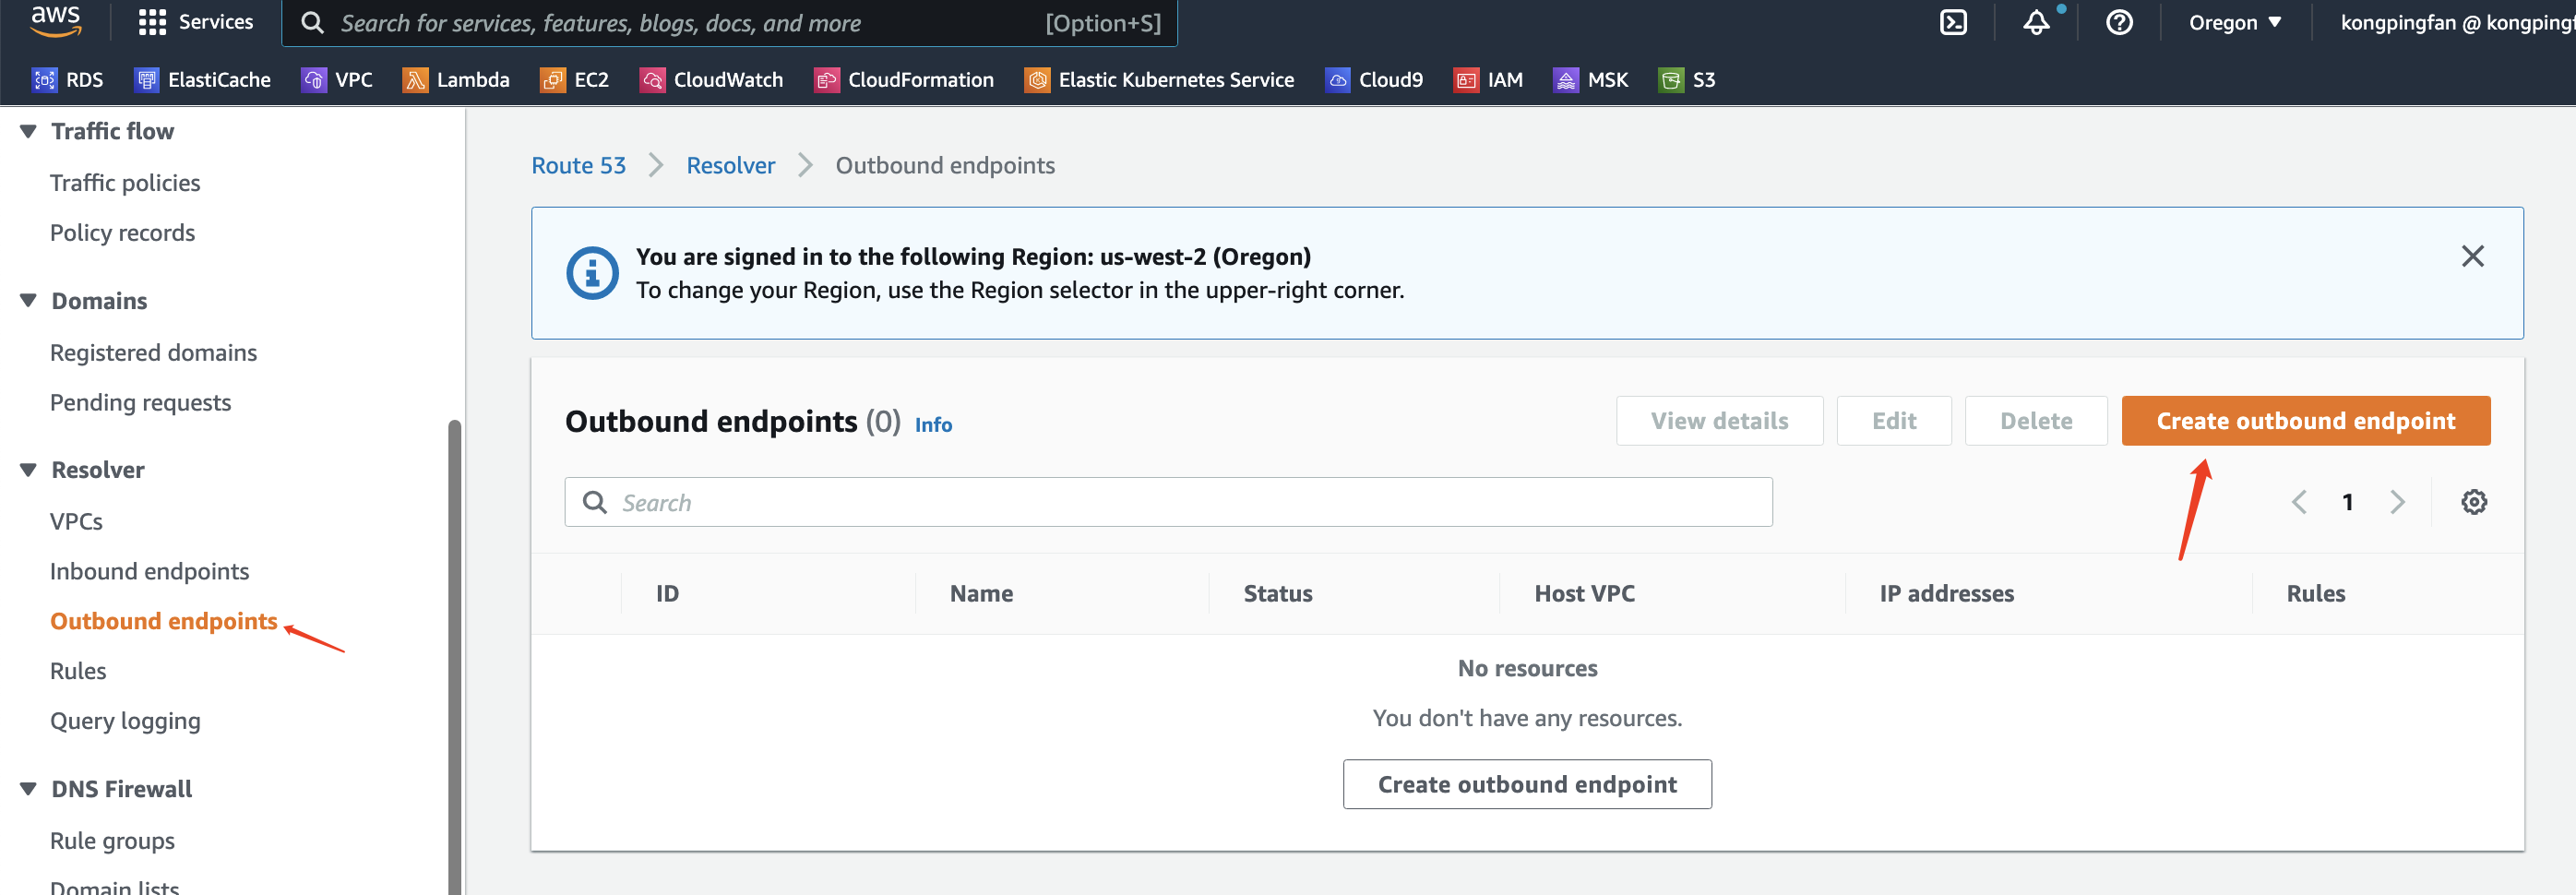
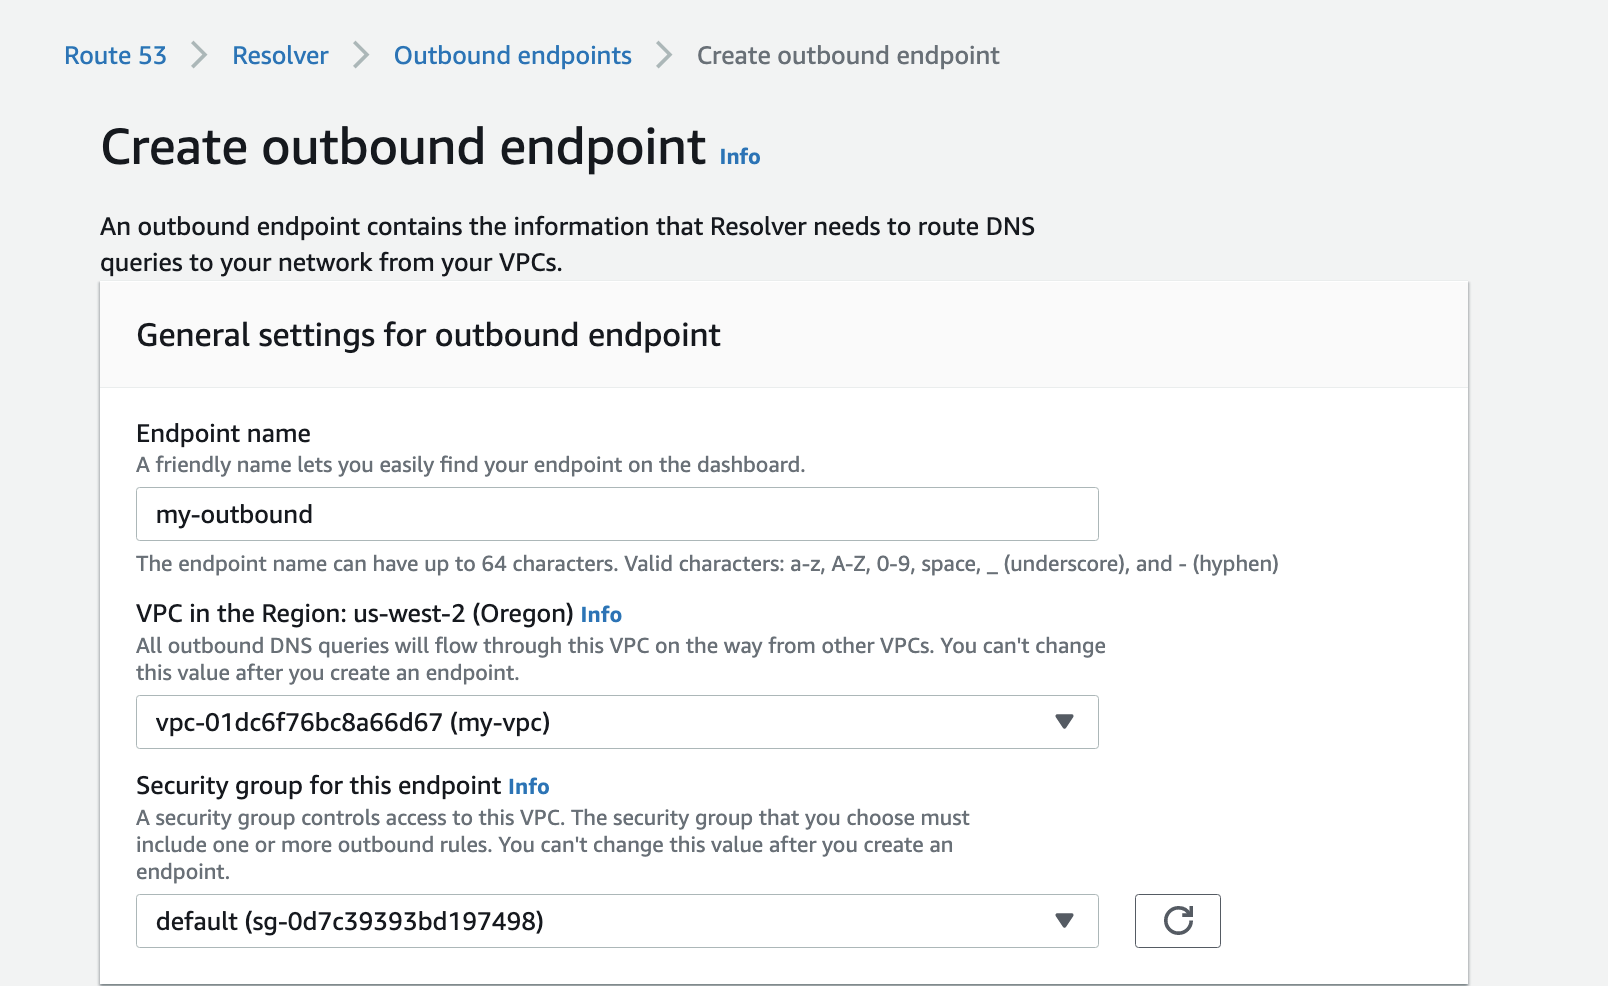
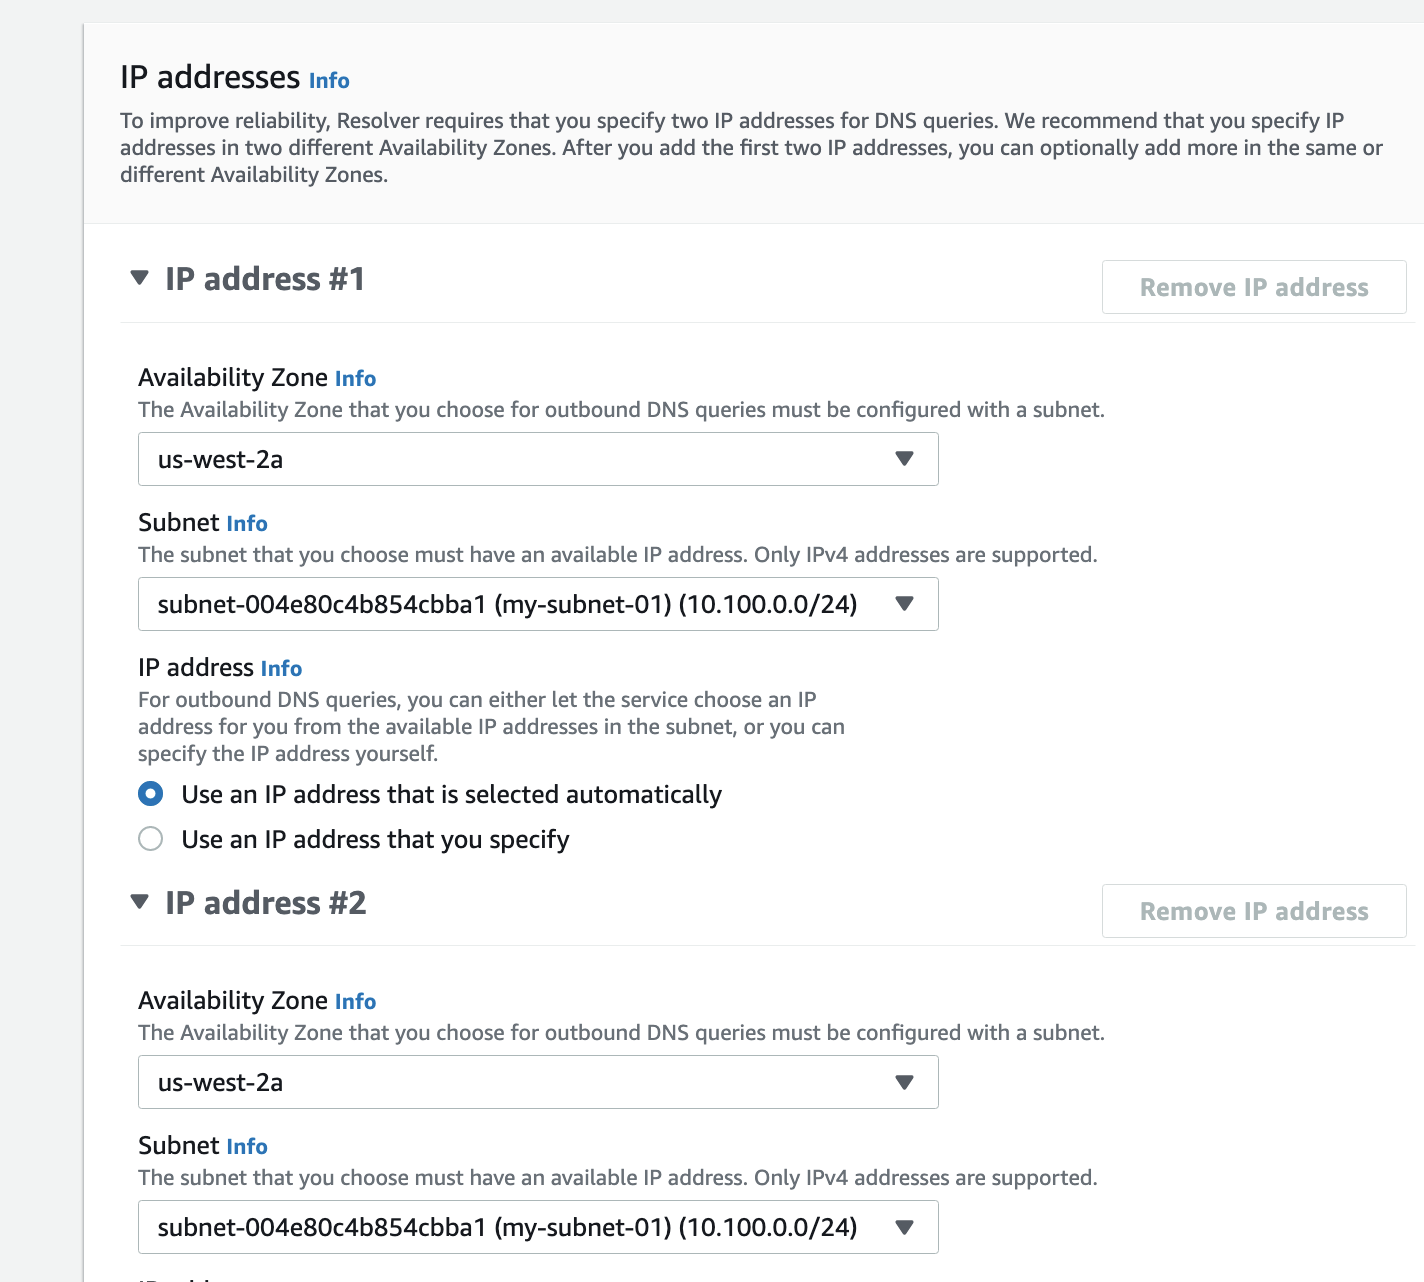
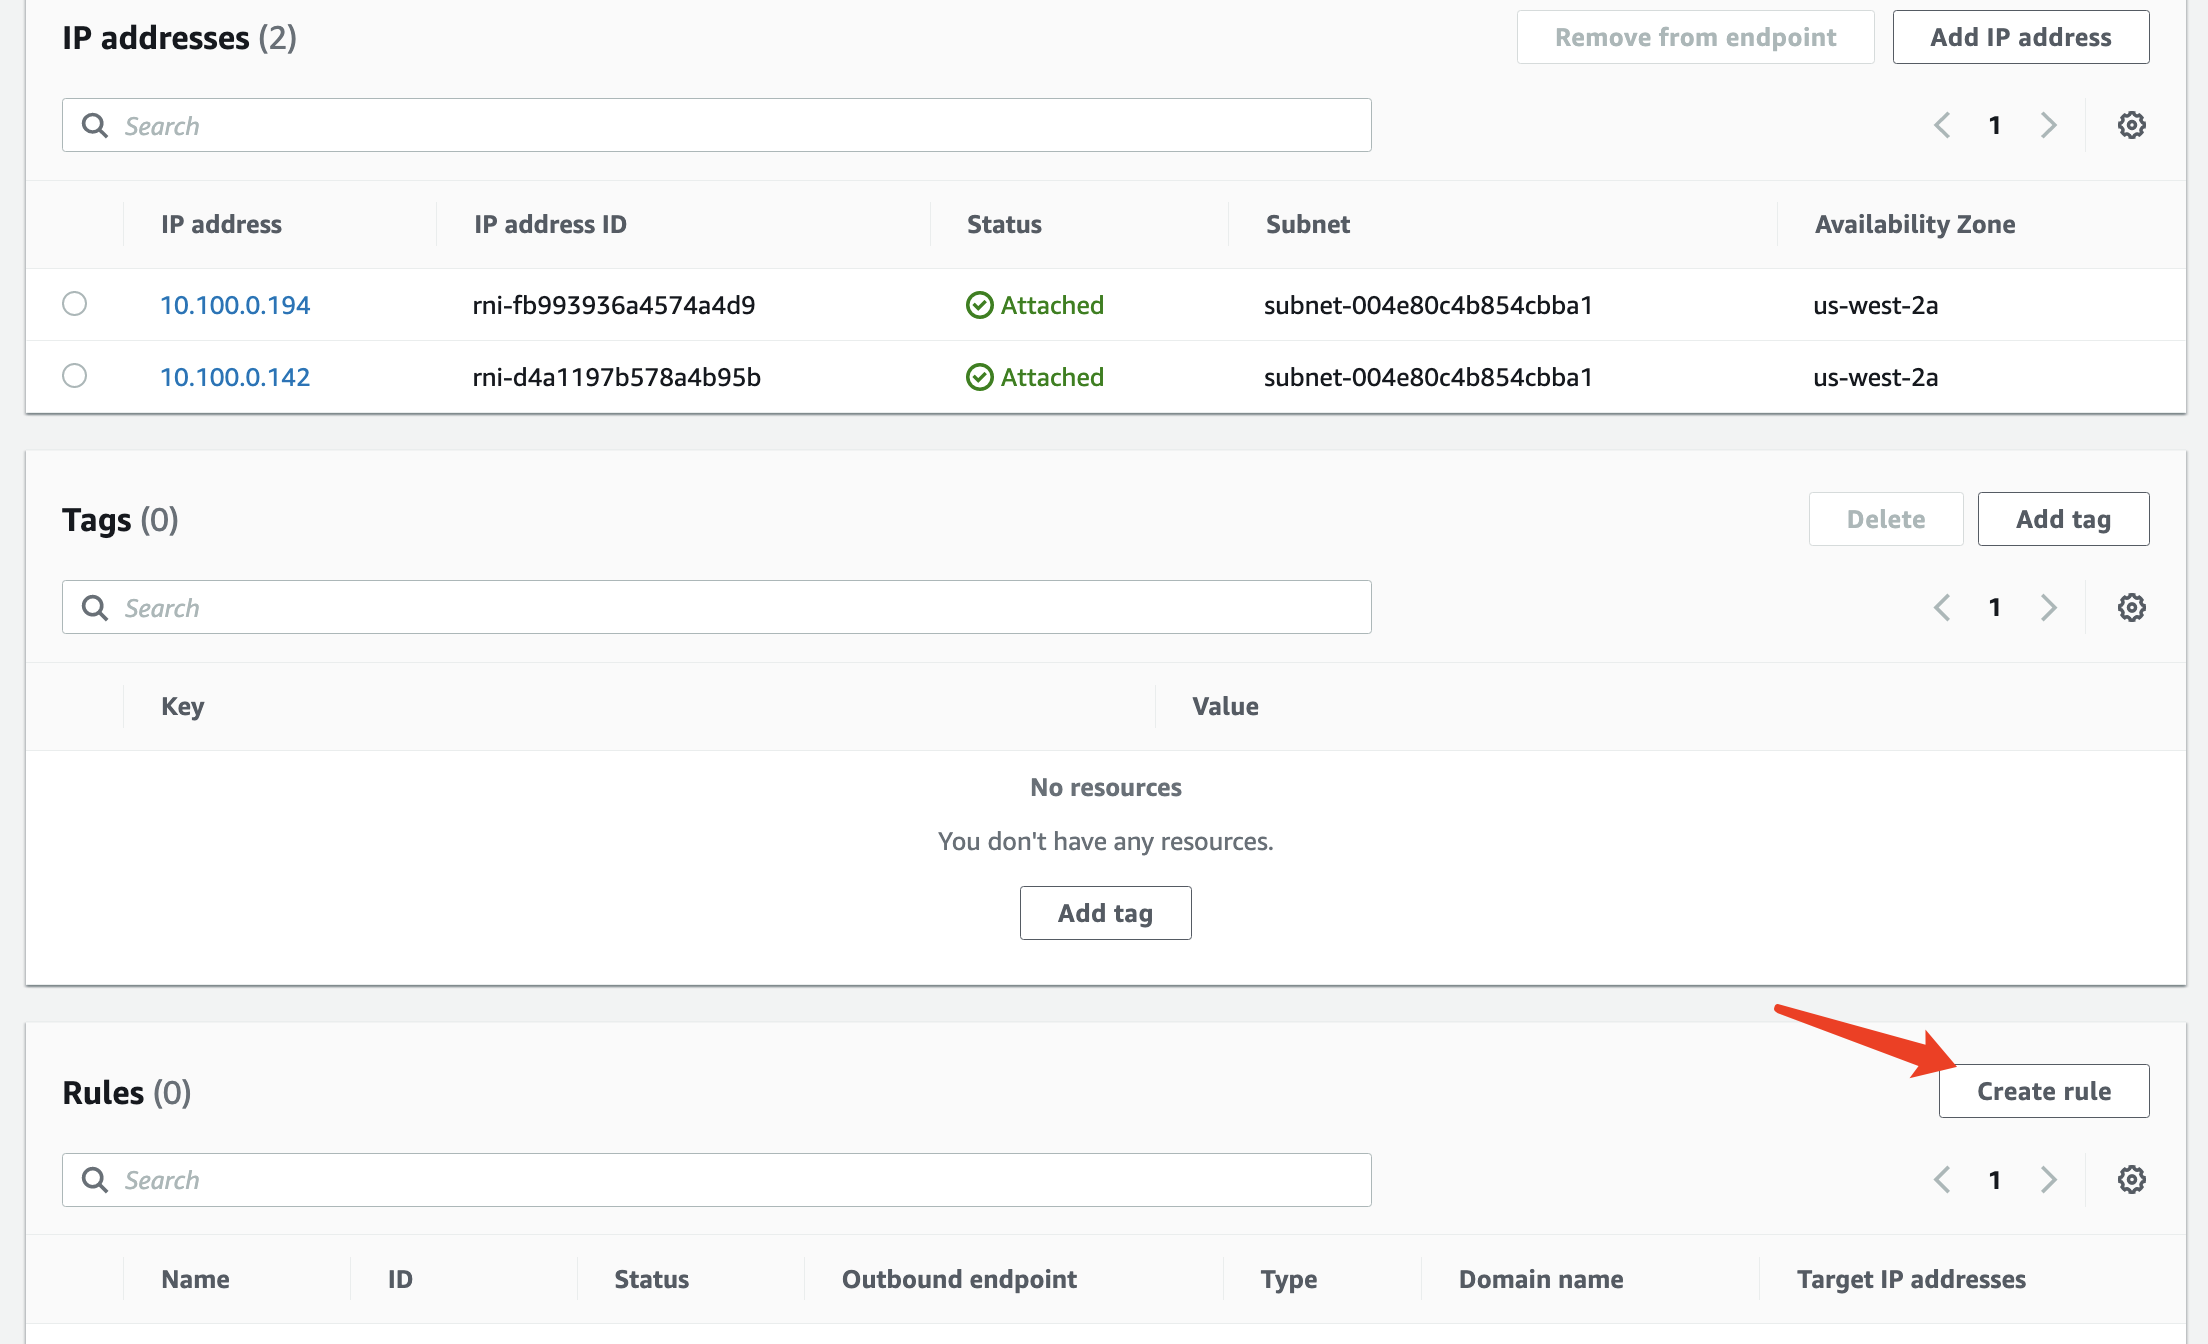
创建outbound endpoint


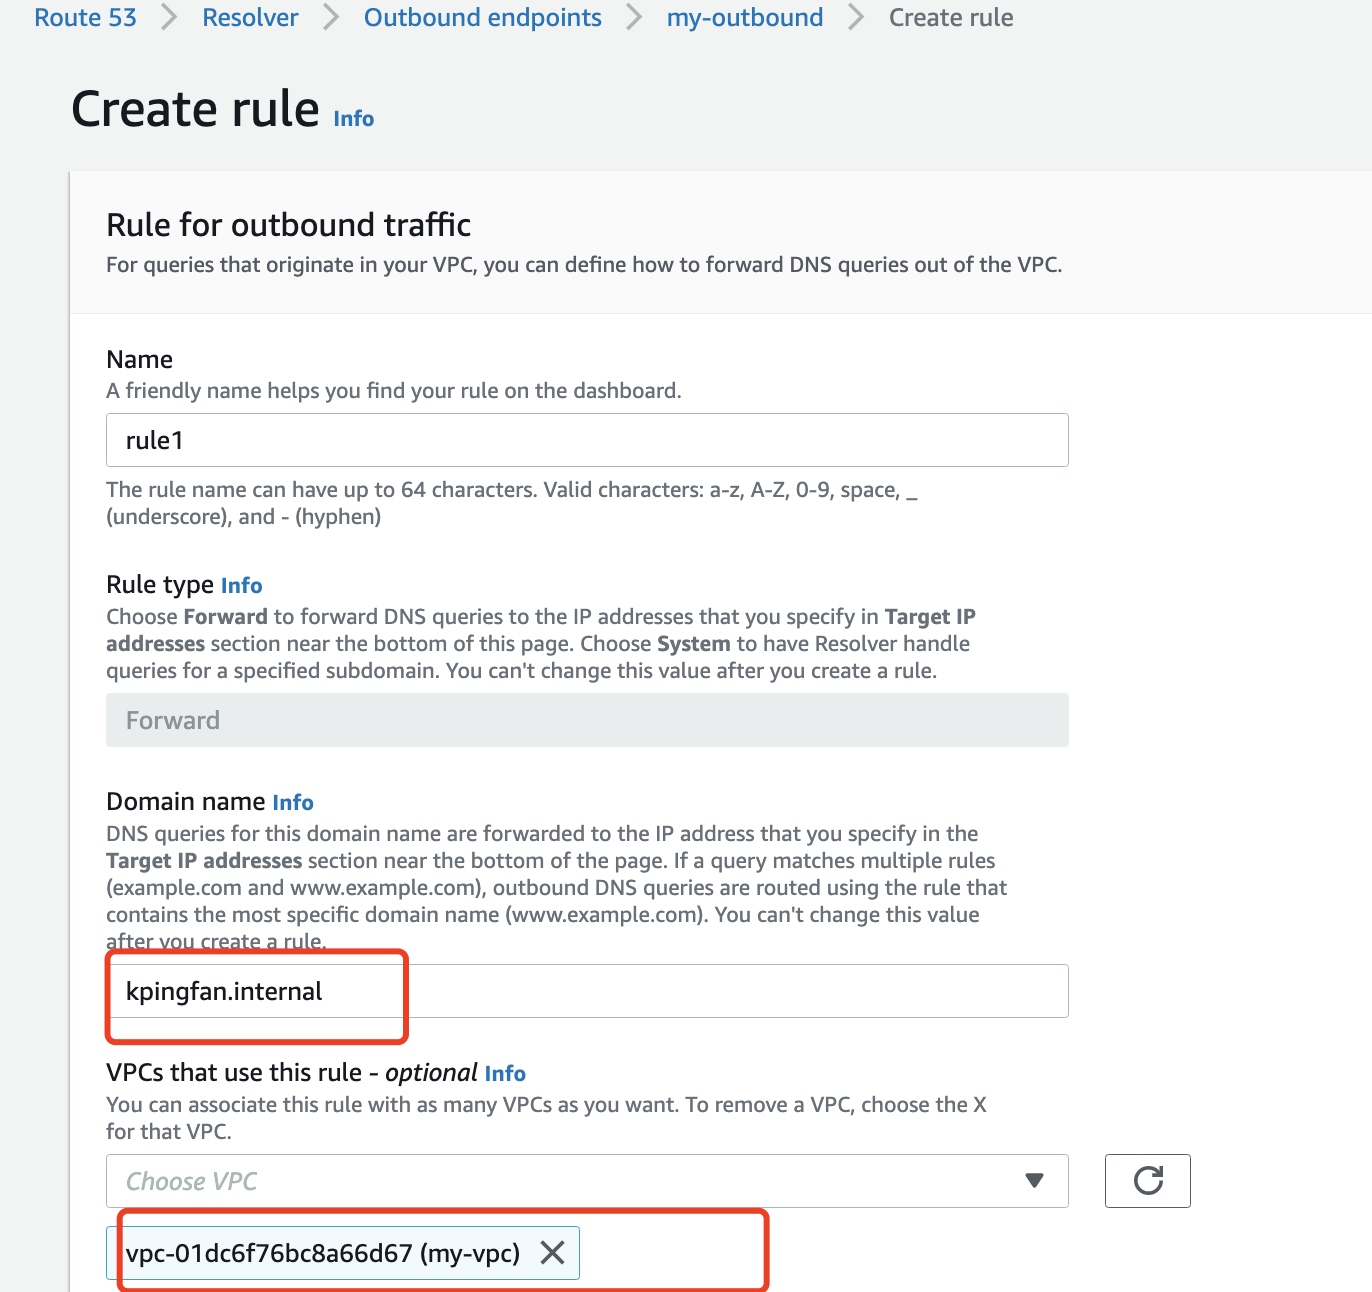
创建完成后,需要添加一条rule:
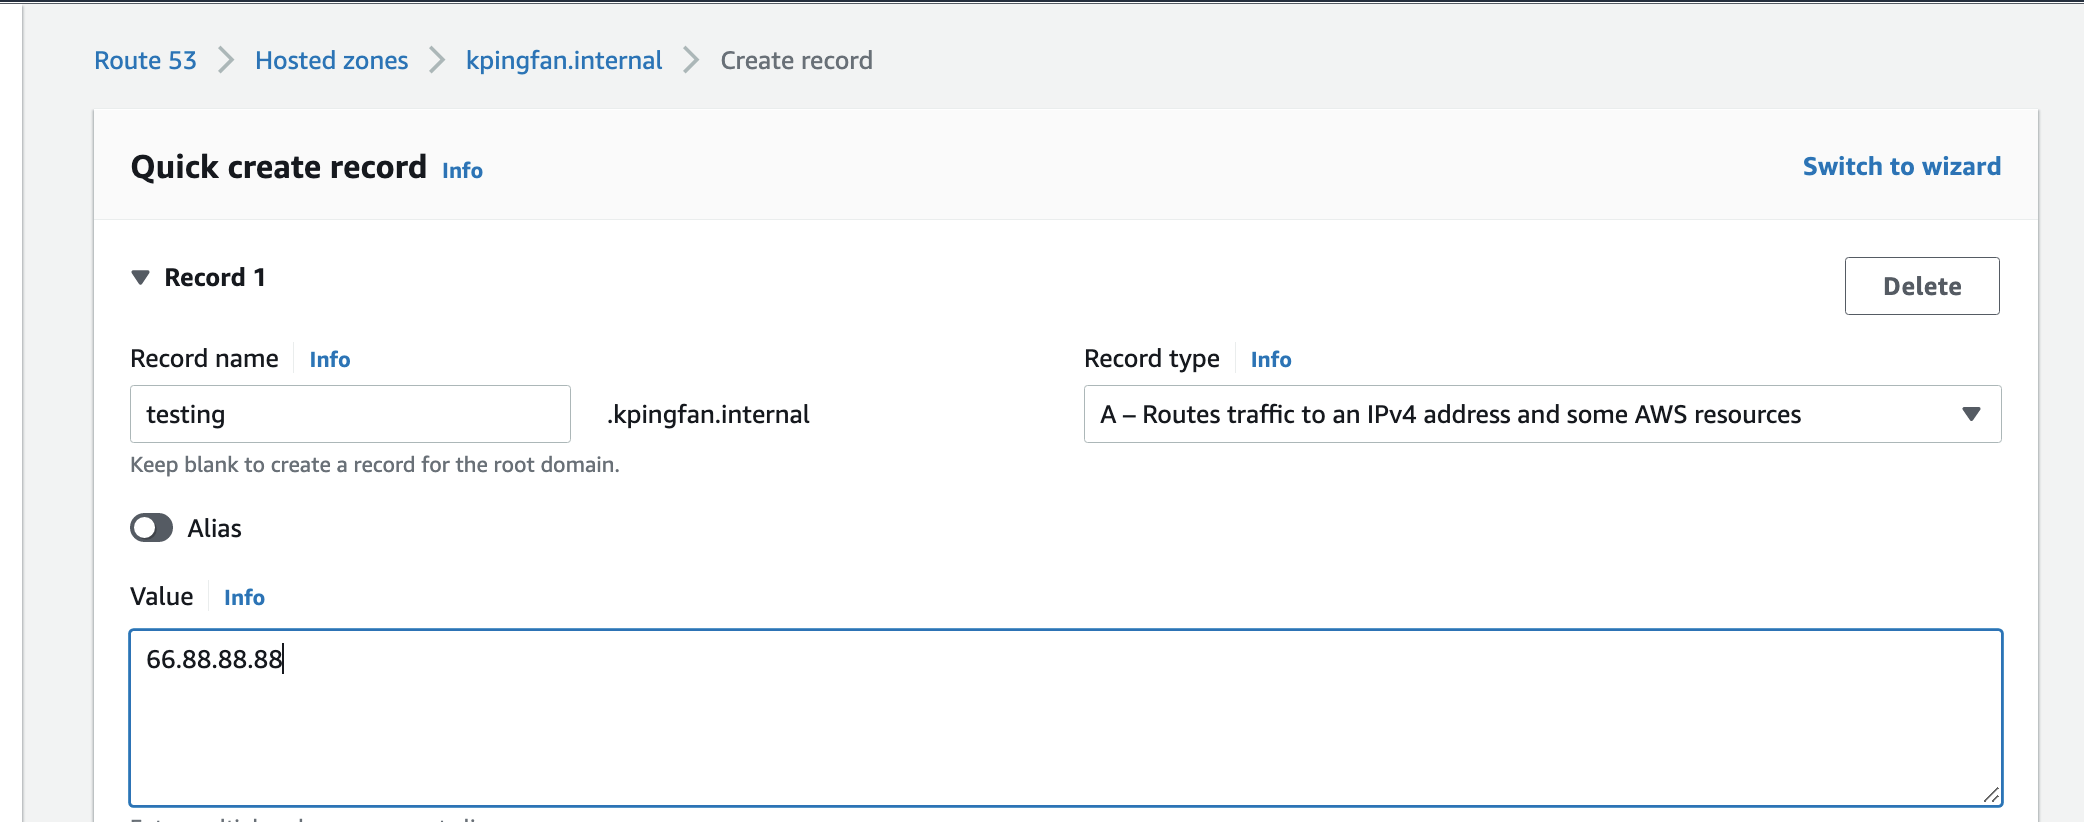
指定域名和域名所在服务器IP:

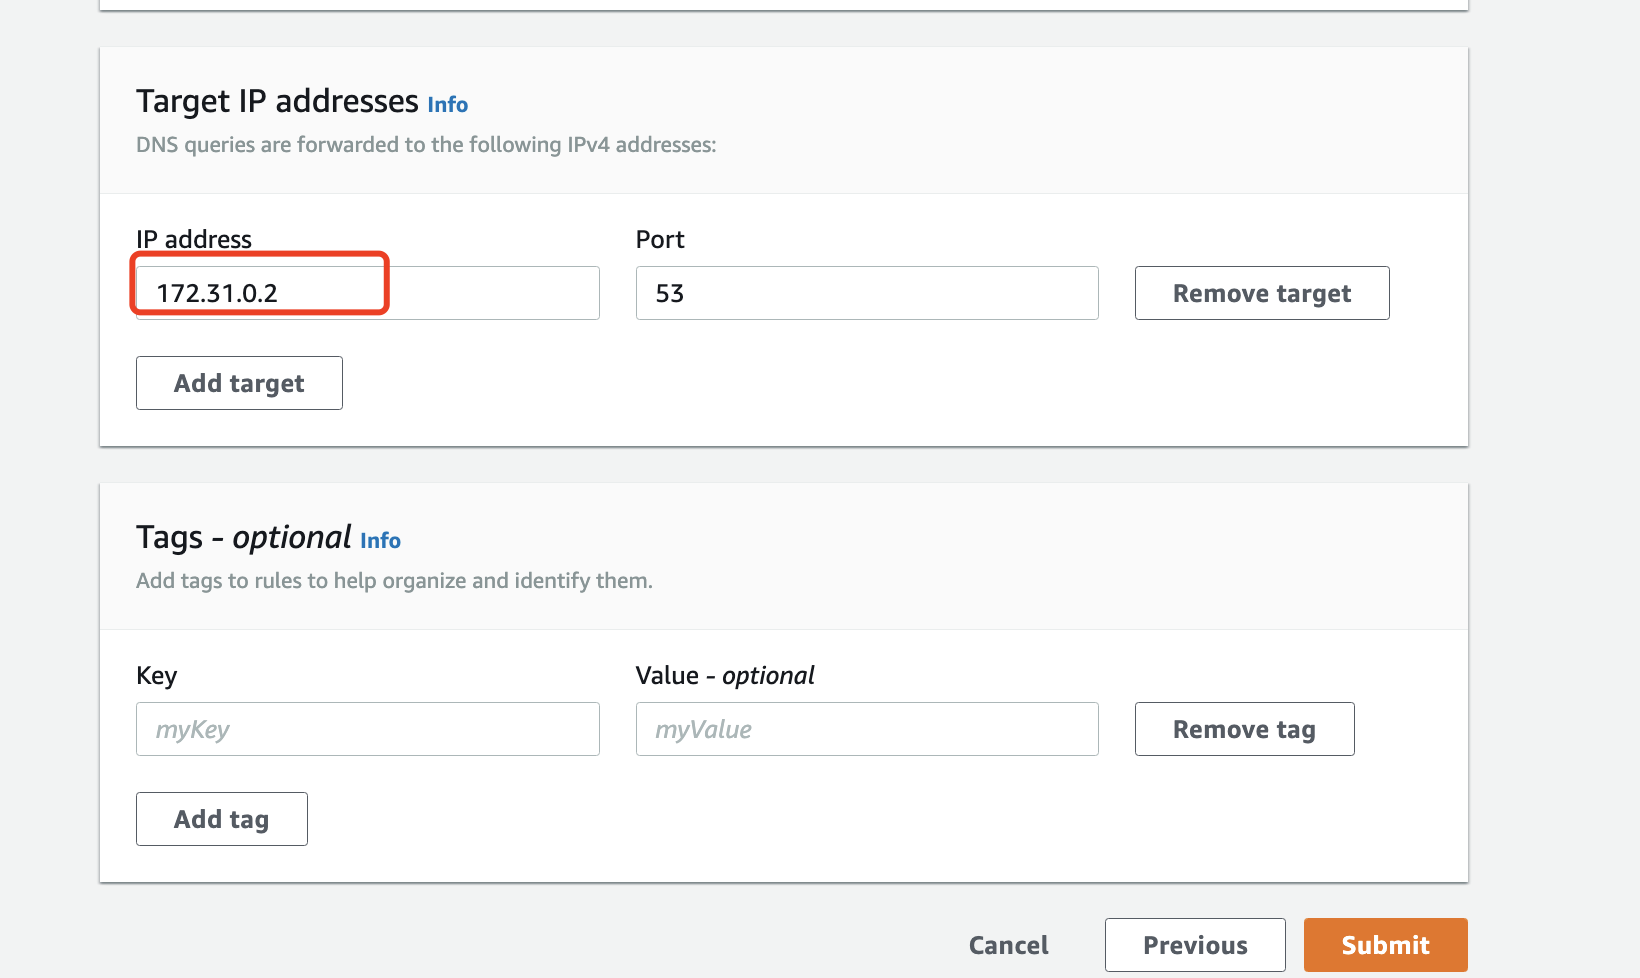

此时在另一个VPC下面进行nslookup,发现不能成功。

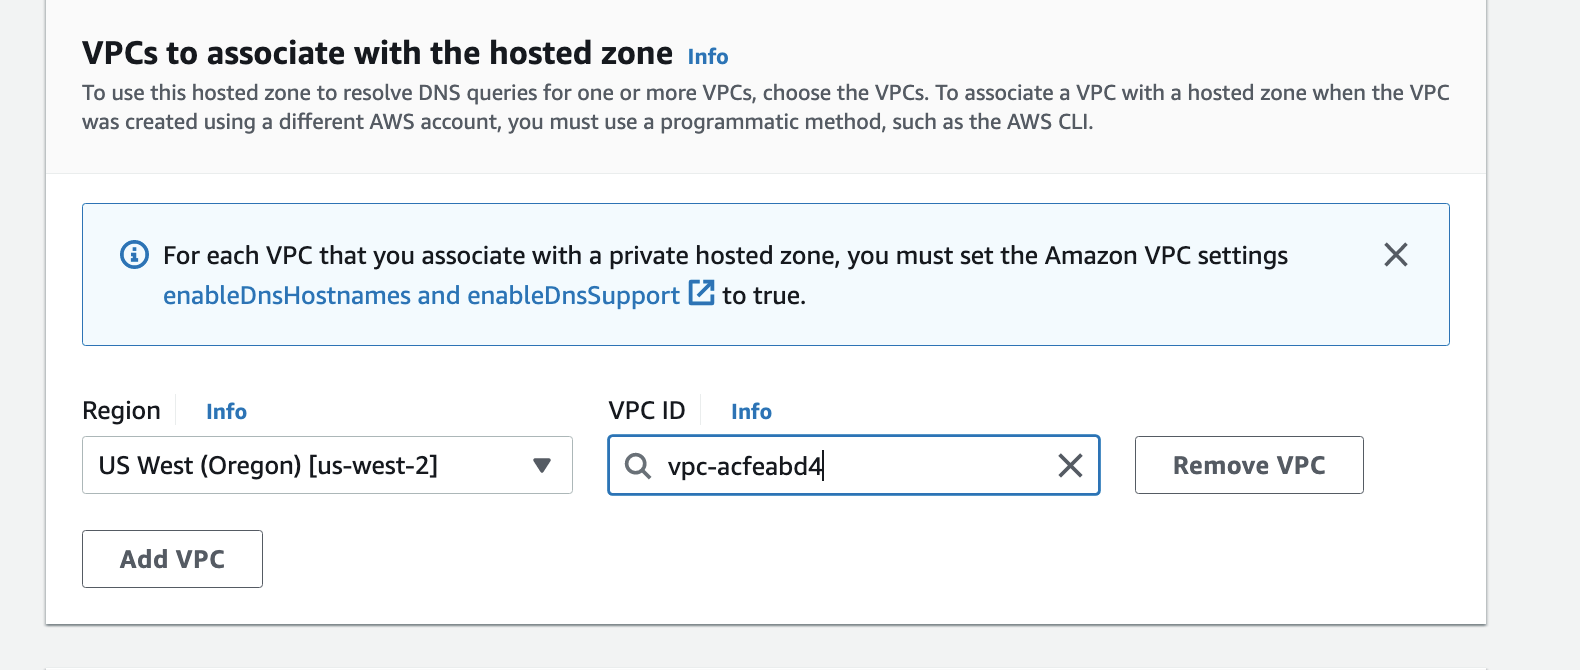
最终定位到原因,原来Rules里的DNS服务器IP要写成私网形式,改成私网形式后可以解析到:

